The alternate title for this post, given to me by my brother-in-law Lee, was “Food Marketing is Just That”, but I thought the beaver anus would get more attention.
Fall is RUINED – Goodbye Pumpkin Spice Latte
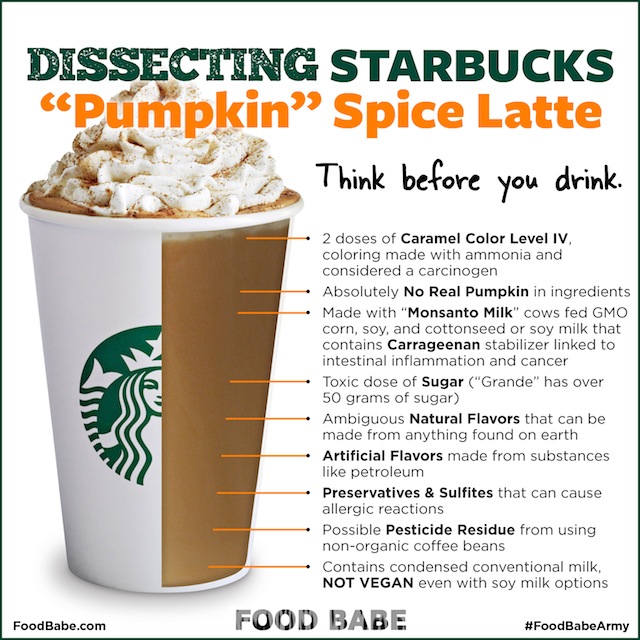
If you’ve seen this Food Babe post on Pumpkin Spice Lattes then you are likely as devastated as I am. My go-to fall drink (because how else do you tell the seasons in California if not by the Starbucks beverage options and cup colors!) is filled with all sorts of disgusting things I do not want in my body. Topping off that list is Carmel Coloring, made with ammonia and considered to be cancer-causing.
This Consumer Report’s article provides info on the risks of Carmel Coloring (4-MeI – also found in many sodas), but the basics are that a federal government study found it caused cancer in mice in 2007 and since 2011 it’s been listed as ‘possibly carcinogenic to humans’ by the International Agency for Research on Cancer. Since 2012, California (man I love my state!) has required manufacturers to label the product with a cancer warning if it exposes consumers to more than 29 micrograms of 4-MeI per day. I have definitely had more than one PSL in a day..crap.
So, goodbye Pumpkin Spice Lattes. Until Starbucks makes some serious ingredient changes, my fall will remain PSL- and cancer -free.
Below: Happier times, last fall sipping on my first PSL of the season when I was blissfully ignorant about the toxins entering my body:
Even My Dad Goes to the Farmer’s Market

Dad and I drive the vintage convertible to our farmer’s market (and yes he’s looking at the camera – he’s a terrifying driver!).
This summer, I spent two weeks on the East Coast in late August/early September – I know, slow blog summer – I was too busy enjoying people! Heading back east is one of my favorite activities, as I get to see friends and family and look at that big Connecticut Sky, but it also comes with some panic around what I will eat. My Dad’s favorite meals to serve me (and don’t get me wrong, these things are always delicious!) are processed turkey kielbasa, pierogis and iceberg lettuce out of a bag. Ok the bagged lettuce is never delicious. Dad has really come a long way in the food department, now buying hamburgers from our local butcher and almond milk, but the Tolland county area lacks my beloved San Francisco eating options. Or so I thought.
Kale chips and food trucks. In Coventry, CT. I’m serious. My Dad has been raving about the Coventry Farmer’s Market for over a year and frankly I didn’t believe that it would be that good. My weekly shopping trips include the Ferry Building farmer’s market and Mission Community Farmer’s market and I thought: Connecticut, please. The big guy convinced me to hop in our convertible (1990 Mustang ragtop- not very sustainable but almost a classic and so very fun to drive!), and we headed over to check this thing out. Well, the Coventry Farmer’s Market is incredible. It’s huge – more town fair than market. It has real Mexican food – the closest thing CT had to Mexican food previously was Qdoba and we all know how authentic that is. It also has a cannoli food truck, gluten-free bakery stands, local artisans selling soap and woven placemats, and sweet summer corn for $0.25. This was my heaven. Eastern Connecticut has an entire local, anti-GMO, farm-to-table, food movement that I knew nothing about. If you live in or near CT, this site will help you find all things local food.
If my Dad is shopping at the farmer’s market, you can too. One reason he shops there is because it often isn’t more expensive – my Dad hates expensive – and everything tastes better. Vendors let you try things (husk tomatoes/ground cherries were a new one for us!), tell you how to prepare the produce if you’re unsure, and you’re doing a world of good for your body and your local economy. If you need more convincing, read Barbara Kingsolver’s Animal, Vegetable Miracle, watch one of my favorite documentaries, Food Fight, and think about the impact YOU can make on the planet and your community.
Below: My favorite food truck (cannolis!) and juicy summer watermelons
Eating Mushrooms In Prospect Park – Meet Forager Ava Chin
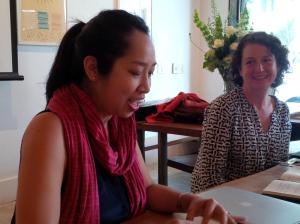
I recently joined 18 Reason’s FoodLit Book club (I know, how very San Francisco), and the first book I read was Ava Chin’s Eating Wilding. We were lucky enough to have Ava join us and in addition to discussing foraging, love and the process of getting a book published, I got to try my first foraged greens pie. Holy yum.
Ava’s book is a quick, honest and endearing read weaving together stories on childhood, love, family, nature, and food – so many wonderful things to relate to! I’m going to focus on the food part, as I was blown away that you can find safe and edible things to eat, in Brooklyn’s Prospect Park or in a neighbor’s backyard in the middle of winter. Ava describers herself as a sort of life forager (searching for love, her father, and morel mushrooms), and started by using Euell Gibbon’s Stalking the Wild Asparagus as a field guide while roaming the streets of NYC. She finds and eats all sorts of things: oyster and morel mushrooms, field garlic, garlic mustard, mulberries, lambsquarters and wood sorrel (I called these sour clovers growing up) in neighborhoods where I used to live! Her book includes helpful recipes (what the heck do you do with wood sorrel after all), and our discussion helped inspire me to notice the food growing all around me (turns out wild fennel is everywhere in SF!).
As I continue my journey into sustainable eating, my latest quest has been eating seasonally. I’m not sure if I’ll ever be a forager myself (though next time I’m in Brooklyn I will be on the hunt for field garlic!), but I know that delicious things grow in my Bay Area community year round, and that I want to eat them. Since June, I’ve limited my fruit and veggie purchases to farmer’s markets, because the food tastes better. I will admit, I cheated a few weeks ago, missing the blueberries of June, and bought organic Oregon blueberries at Whole Foods. They were disgusting. Missing was the juicy sweet and tart flavors of my summer blueberries, and all that remained were these mealy eyeballs that I couldn’t even feed to the dog. Goodbye store-bought fruit, I now know what fruit is supposed to taste like.
If you’re interesting in foraging: read Eating Wilding, and see if your city or town offers foraging classes or food walks, like this one at Forage SF. Even if foraging isn’t for you, try eating more fruit and vegetables from your local farmer’s market – I promise you will not be disappointed. Yes, you may be stuck with squash all winter, but raspberries in December don’t taste good, so why eat them? Here’s to happy and sustainable eating!
The Sky in China isn’t Blue
Last November, a colleague from our Shanghai office came to San Francisco and took dozens of pictures of the sky. She said over and over again “your sky is so blue” and I thought “of course it is, blue is the color of the sky.”
I r ecently returned from my first visit to the red country, touring through Shenzhen factories on the China mainland. The trip was eye-opening in many ways (FB/twitter/gmail didn’t work, lo mein and corn on the cob are served for breakfast and there aren’t toilet seats), but the thing that shocked me most was the color of the sky, which wasn’t blue.
Being in China, I realized what my Shanghai colleague meant – the sky isn’t blue everywhere anymore. In China, on a sunny day, in Shenzhen which has much less smog than Beijing or Shanghai, the sky is gray.
On really bad days, residents living in Northern cities, such as Harbin, can’t see across the street and planes are delayed regularly due to issues landing in the smog. Beijing officials are looking at trying to wash away air pollution with artificial rain or suck it up with large vacuums (seriously), and Shanghai cops have to wear mini-filters in their noses.
This article gives you a good sense of what the air quality in Beijing looks like. Beijing air pollution levels have been recorded at over 400 PM2.5 (the number of harmful particulates larger than 2.5 microns per cubic meter of air). The World Health Organization describes 25 PM2.5 as healthy air and found that air pollution contributed to 7 million deaths worldwide in 2012, 40% of which were in Asia.
I love energy. I love the energy allowing me to write this blog post right now and the energy that allows me to fly home and see my family. But we have a choice. We can continue to rely on fossil fuels as our main source of energy or we can keep pushing for renewable, clean burning options. If we stick with fossil fuels, our skies will not be blue for long.
I’m going to keep biking to work and promoting renewable energy where I can because a blue sky is important to me. I hope you make the same choice.
More China buildings and sky. I don’t think our future should look like this: 
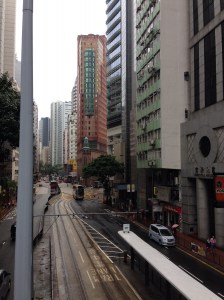
or like this (photo credit: Alexander F. Yuan/AP):
I Learned How to Use the Sewing Machine
 Two Thanksgivings ago my brother’s girlfriend Jen convinced me to go to Target for my first Black Friday experience. We drank a whole lot of wine before (and while at Target, sorry Dad) and I ended up coming home with a sewing machine. I had always wanted to learn how to sew and this Singer gem was too good of a deal to pass up. The sewing machine sat untouched in it’s box for one entire year before I decided to get busy (I also bought a crockpot which I still haven’t used, but how do you say no to deals and those faces!).
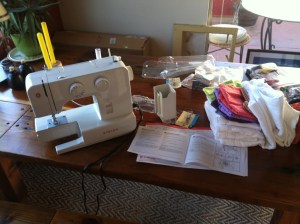
The hardest thing for me was setting the damn thing up and I wanted to throw the bobbin out the window many times. I found Singer’s instructions completely unhelpful. Instead of spelling out exactly what I did, I’m going to point you to what I followed: tutorials on setting the machine up and threading it. This Tilly saved me after hours of frustration with the Singer packet. I like her pictures, step by step instructions, and that she provides the names for everything (how was I supposed to know what a freaking presser foot is). If this doesn’t work for you google ‘setting up a sewing machine’ or ‘threading a bobbin’ and there are all sorts of videos on YouTube and pictures that will help. Take a deep breath, I promise you can do it.
Ok so you spent one whole day and now the machine is set up, woo hoo! Now, what will we sew?! For inspiration I turned to my favorite homemaker, Caitlin of Hardly Housewives. I started with a beginner project, Embellished Dishtowels. Again, I’ll let you read through Caitlin’s post for instructions but here are my tips for true beginners (like me!):
1. Go to Joann Fabric. They are super nice and will help you buy pins, thread, etc. Buying fabric proved completely overwhelming for me so I started out by buying these pre-cut squares (which are perfect size for embellishing a few dishtowels). You’ll see them in the store near quilting and though they are more expensive than buying by the yard, they are still cheap ($3 per square) and didn’t give me anxiety like walking through the fabric isles did.
2. It’s ok to buy these cheap dishtowels at Target (that’s what Caitlin uses and she’s a pro).
3. Get ready to do more ironing then sewing. Ironing (after washing/drying the fabric) is BY FAR the longest part of the process. You iron for an hour and then sew for 2 minutes, be prepared. When ironing use a ruler to make sure the fabric is straight (you fold in the edges to create a clean line- check out the Pacifier holder post below to see tips on ironing).
Other fun things to sew and give to friends (except not to mutual friends because they already received these from me!):
- Pacifier that clips to the baby. This one is super easy and really fun – my favorite for sure! Beginner notes: I couldn’t find mitten/suspender clips anywhere so ordered them on Amazon. For the elastic look for 1/8 inch width.
- Embellished burp clothes. Similar to dishtowels and also makes a great present. Beginner notes: Go to Target to get the pre-fold diapers. I believe they are these ones, but it’s helpful to hold them up and make sure they are the size of a laptop (13″ or so). I messed up and bought the three-fold ones at first and they were HUGE. I apologize to those who got these in the mail.
- Napkins. Beginner notes: these are the hardest of the four and I’ve only made one set. I had a tough time keeping them square so measure as you go and make sure everything lines up.
As you can see from the above I’m still figuring out corners and how to end the stitch. Since a baby is going to puke all over this anyways, I sent them out as is. If you figure out how to do corners please let me know – good luck!
Baking Soda for Everything
As I continue my journey into SF hippiedom, I’m into making things myself these days (or at least attempting to).
Val, a friend of mine and true DIY queen, is on a mission to empower people to create their own beauty products so they know exactly what they’re putting on their skin and hair (as we’ve already discussed – many over the counter products contain petrochemicals, parabens, and gross things like that). I went to her first DIY beauty-product class to try my hand at making products from scratch that work as good, or better, than those we buy. The night I attended, we created a coconut oil scrub, citrus astringent and a custom moisturizing face oil. I was nervous that the products would be complicated to make (I’m super lazy), and was pleasantly surprised that it was actually super easy.
We started with the coconut oil scrub (sounds dreamy right, and you’re already willing to shell out $12 for a bottle). Well save yourself some cash and a whole lot of time and mix equal parts coconut oil and baking soda in a bowl and stick it in a little tub (you can even use an old product tub). Yes, that’s seriously it. Use it as you would any exfoliating face wash: 2-3x/week, wet, rub on and rinse. You’ll feel the oil on your skin after you rinse and understand what moisturizing really means. You can also try sugar and salt instead of baking soda to get the right grain of exfoliation for you.
Benefits/things to know:
- The commercial moisturizers you’re spending a fortune on contain mostly water, which makes you feel like your skin is being moisturized, but as soon as the water dries, your skin becomes dry again.
- Coconut oil instead provides deep (and actual) moisture.
- It also helps strengthen underlying tissues, remove excessive dead cells, improves dark circles and helps with wrinkles.
- Baking soda is a common cleanser and odor neutralizer and doesn’t seem to dehydrate my skin or strip away healthy oils.
- I have rosacea and the combo proved too much exfoliation for my rosy cheeks. Now I use the scrub as an all over body wash and use coconut oil (w/o baking soda) around my eyes. I also use coconut oil on my hair about once a month to make it shine (heat up 3-5 tablespoons, pour and rub into your scalp or just the ends, wrap it up with a shower cap or old t-shirt, leave it on for at least 2 hours though 4 seems to be my sweet spot, shampoo it out. Mine usually takes 2 shampoos to get the greasy feeling out but it’s magic on your locks.
- This combo is also super cheap. Baking soda is about $1/box and coconut oil is $12 for a sizable tub. I still haven’t worked my way through either the box or the oil and it’s been about 3 months.
- I also use the baking soda/coconut oil scrub on my teeth once or twice a week. Baking soda is an amazing way to whiten teeth and lift those annoying wine/coffee stains (I drink a lot of wine and coffee) and with the coconut oil it rubs on really easily and makes my mouth feel nice. Here is a good list of other ways to use baking soda.
- Liv Tyler and Emma Stone also use baking soda to bathe so it really isn’t that weird.
Moving on quickly to the last two products (I know, that first one was a lot). We made a super easy astringent (use with a cotton ball to deep clean your face and open up pores or at night to remove make up). Below is the recipe and the highlights are it smells nice, removes makeup and gunk and wakes me right up!
- 1 oz witch hazel (you can get a measuring cup shot glass that has liquid ounces at Crate & Barrel – that may be obvious to everyone but I’m still learning these things)
- 3 oz orange blossom water
- 1 tsp apple cider vinegar
- + essential oils. You only need a few drops (seriously 1-3 drops) of whatever you want to smell.I used lemon because citrus seemed a peppy way to wake up in the morning.
- I know it can be annoying to buy a bunch of essential oils so this one is for the more advanced who want to really experiment and make these products for long term use/savings.
 And finally, and arguably maybe my favorite: facial oil. First of all, I could not believe that there is this whole group of people out there that clean their face (yes clean, not just moisturize) with olive oil and other oils. You can straight up rub oil all over your face (olive oil, sunflower seed oil, etc.) as a cleanser and apparently it’s great for many people. I haven’t made it to that part yet but have started using a facial oil at night instead of a night creme. I made mine with macadamia nut oil (the lightest one for my sensitive skin), 2 drops of vitamin E oil (anti-oxidant but only use a few drops), 2 drops of rosehip seed oil (firming/anti-aging) and 2 drops of sandalwood essential oil for a nice calming night-time smell.
Let me know if you try any of these out and how they work for your skin. While everyone’s skin is different, these are pretty basic and can be a fun place to start when entering the world of DIY products. Use them for a few weeks before you decide if it’s working for you (my face broke out with the oil for about 4 days then calmed right down). Stay tuned for my next DIY adventure: I learned how to use the sewing machine.
A GGG Halloween
Work gets crazy, blog dies down; story of my life. I missed a post on the government shut down and the risk to food safety since the FDA was only checking meat and fish (not fruit, veggies, dairy products or anything else – remember the spinach and peanut butter salmonella recalls?!). You can instead read a good NY Times article about it if you’re interested.
 On to Halloween. I don’t have kids but have been contemplating what to hand out to the few children in our apartment building who will come knocking on our door (oh man I really hope they come!). After much debate, I settled on Annie’s Organic Bunny Fruit Snacks. One selfish reason is because my husband loves them so we already have them in the house, and if the kids don’t show, he’ll eat them.
The main reason though is that that they are a healthier (and still delicious!) option to candy. At 70 calories per pouch, while they do contain cane sugar, they also are made with real fruit juice, have 100% vitamin C, are gluten free and vegan (so no worries on allergies), and are non-GMO. Most importantly, they have no synthetic colors.
I did a little research on a Halloween candy favorite, candy corn, and was disgusted to learn that there is more than a gram of sugar in EACH piece AND they are filled with Red No. 3. Red No. 3 is a synthetic dye, used to make them orange, which has been given a “high concern” rating by the Environmental Working Group because it’s a carcinogen.
In 1990 the FDA instituted a partial ban on Red No. 3, citing research that high doses have been found to cause cancer in rats, but left it there much to the dismay of consumer protection groups. So while you won’t find it in lipsticks, baking mixes, seasonings or jello, you may still be ingesting it in soft candies, juices, gum, and breakfast cereals. Other candies on the terrifying list: Now & Laters with Red 40 carcinogenic dye, Necco wafers (Red 3 and 40, sweet double dose), and Sour Skittles (Red 40 and Yellow 6).
Annie’s fruit snacks get their color from black carrots, which may lead to… improved eye sight? Check the labels and check yourself before you hand our fistfuls of cancer to the adorable kids dressed as princesses and pirates on your front steps this Halloween!
The Supergreen
A friend sent this link to me to see how Supergreen I really am. A few of the things listed I already do: of course I follow @michaelpollan, work with The Nature Conservancy, and read Grist. And a few more things I can’t wait to start doing: Fair Trade Finder app welcome to my life!
Check yourself out – how Supergreen are you?!
SF’s Homeless Problem is NOT Sustainable
Sometimes a picture replaces the need for words. I took this picture from my bicycle around the corner from where I work, from where Twitter employees work, in the Mid-Market/Tenderloin neighborhood of SF. Every day I see people that don’t even look human – drugs and extreme poverty have destroyed their bodies, their faces, their eyes, their souls. This is how the other half lives. I don’t have an answer, I don’t really even have a post, right now I just have a picture.
